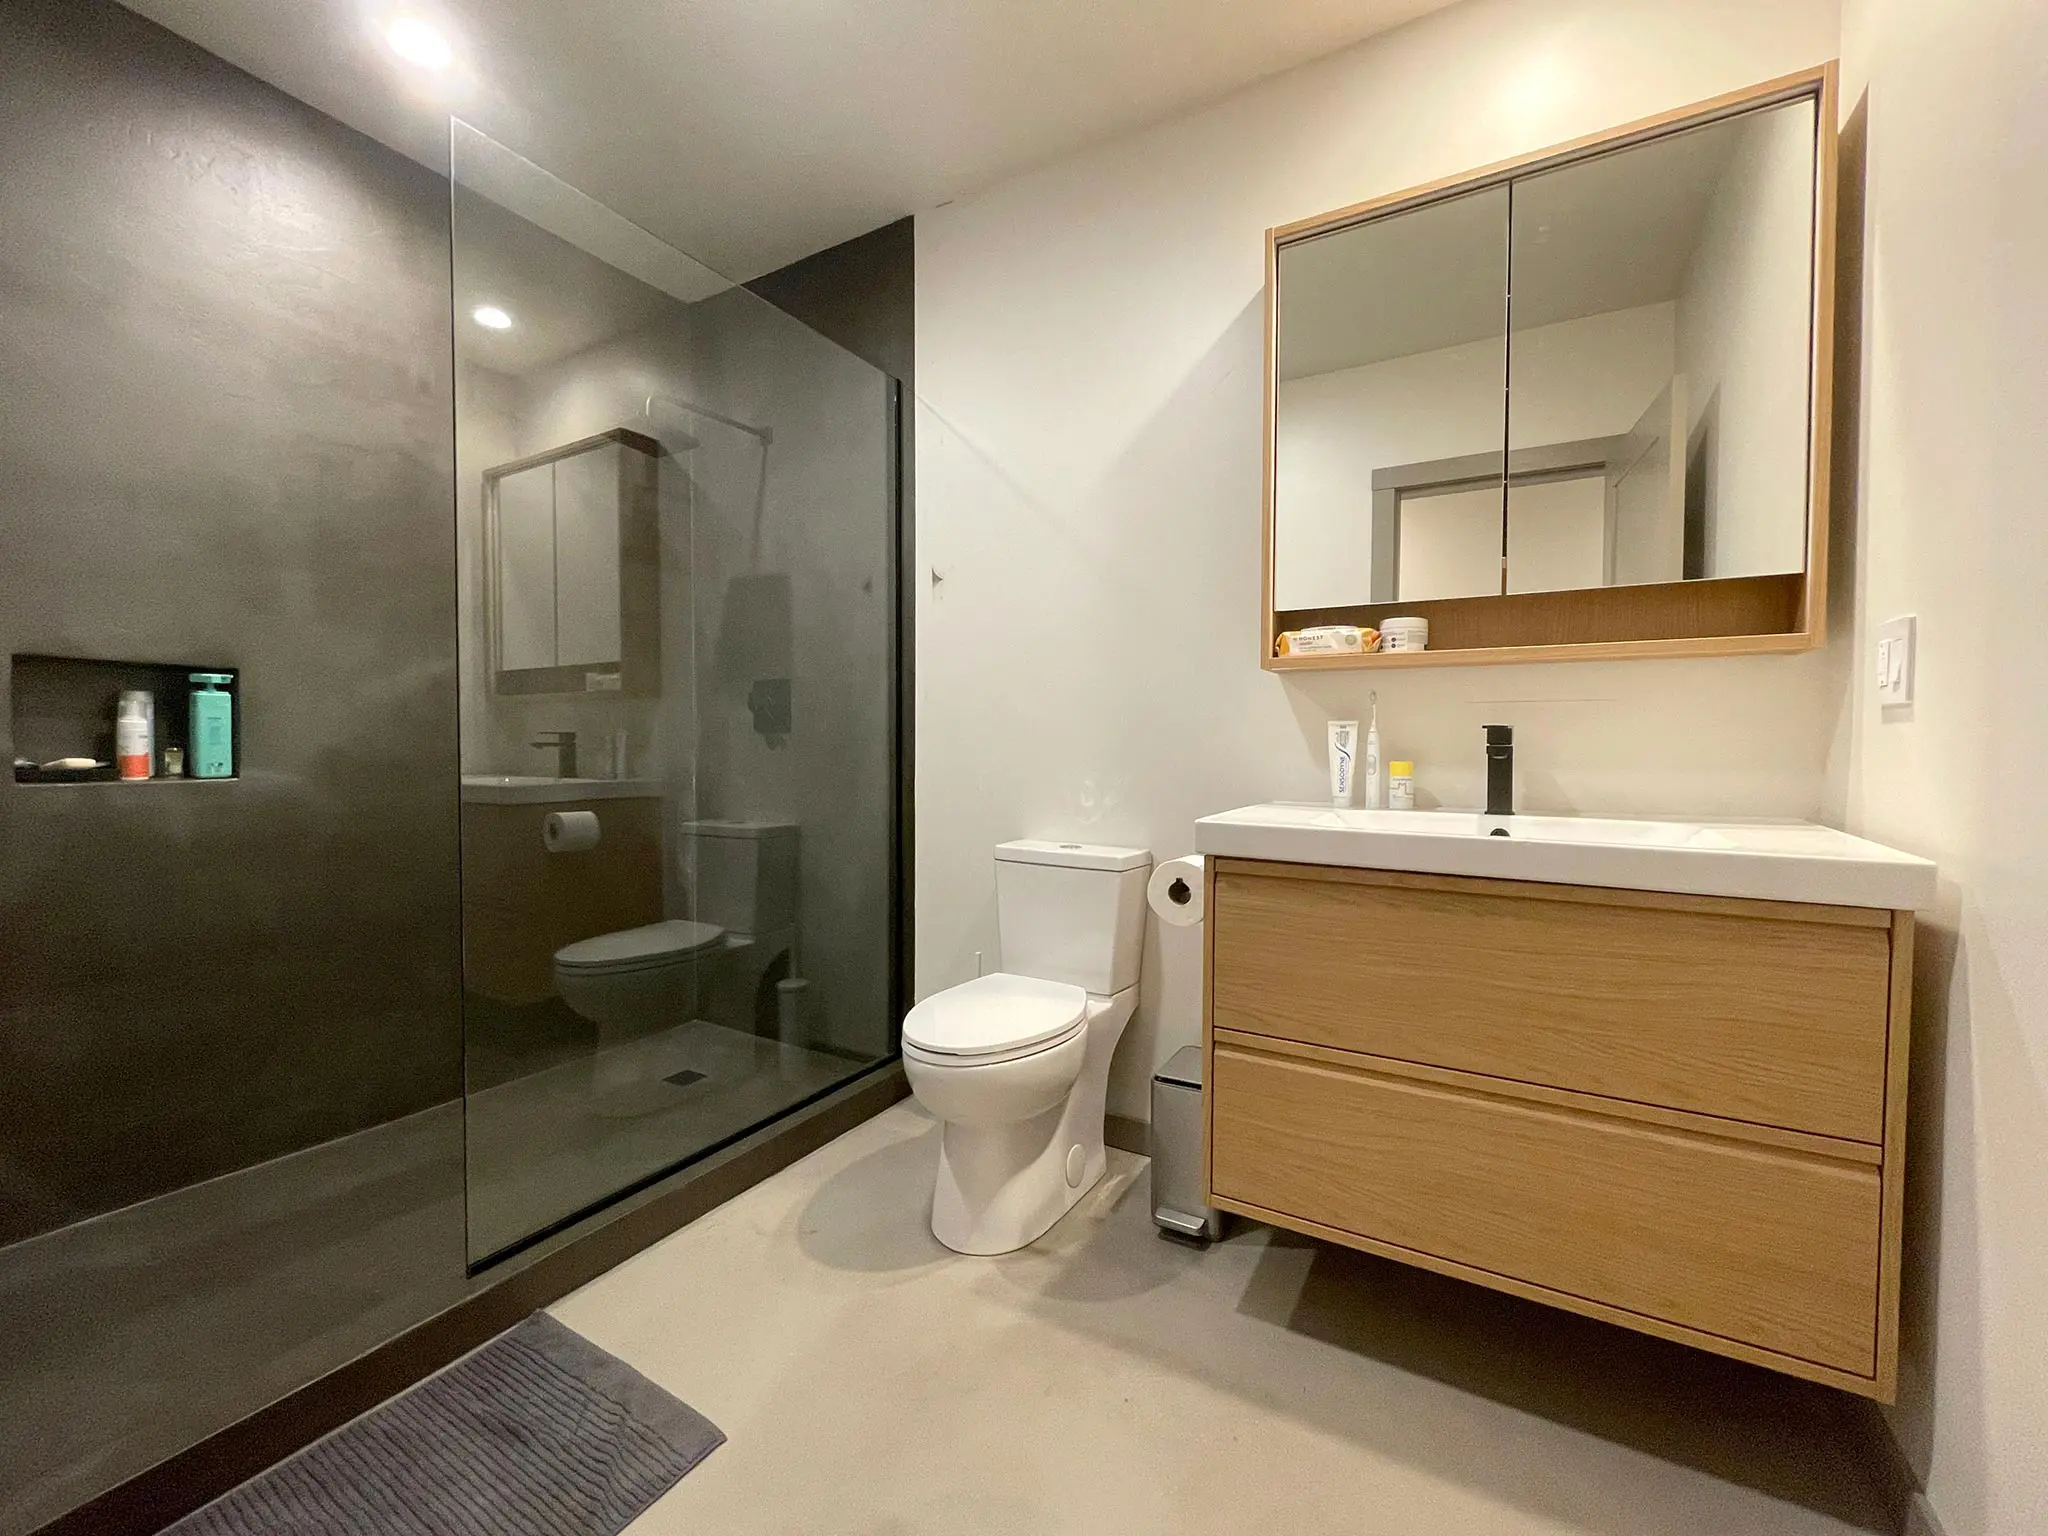
Installing A Microcement in Your Bathroom and Shower Stall.
A bathroom remodeling project is typically a small project as far as home projects go. When it comes to remodeling bathrooms and shower stalls, most people’s first thoughts are tile floors and fiberglass shower replacements. However, concrete microcement is a very modern, durable, and waterproof material with many advantages over other materials.
Interior design using concrete microcements is a very popular choice for many homes. It can be colored, stained, and dyed, making this building material an interior designer’s dream. Microcement walls, flooring, showers, and countertops can be textured or smooth for a modern or earthy appearance.


What is a microcement?
A microcement is a blend of cement, mineral aggregates, and polymers applied seamlessly over various surfaces, including tiles, concrete, drywall, and wood. It offers a durable, waterproof, and customizable solution for showers, walls, and floors, making it an ideal choice for contemporary bathroom designs.
Duraamen’s microcement product is Skraffino. Skraffino Microcement is one of the easiest-to-use concrete products on the market today.
Here are just a few advantages Skraffino has over other floor and wall finishes.
- Aesthetic Versatility: Skraffino microcement can be applied in various colors, finishes, and textures, allowing for a high degree of customization. This versatility makes it a popular choice for modern and contemporary interior designs.
- Seamless Finish: Skraffino microcement creates a seamless surface without grout lines, contributing to a sleek and clean look. A seamless finish is aesthetically pleasing, making spaces appear larger and more unified.
- Minimalist Appeal: Skraffino’s minimalist look aligns with contemporary design trends that favor clean lines and understated elegance. Its neutral appearance can complement various design styles and color schemes.
- Texture: Skraffino microcement’s smooth texture adds a refined and polished look to surfaces. It can mimic the appearance of more expensive materials like polished concrete or stone at a lower cost. Optional anti-slip textures create a decorative and safe surface for use in bathrooms, showers, and other places where wet floors are common.
- Sheens and Reflectivity: Skraffino microcement can be finished with a matte or gloss sheen. Skraffino can have reflective properties that enhance the lighting in a space or a matte finish that resembles natural concrete or stone. Either adds to the overall ambiance and aesthetic appeal.
- Adaptability: Microcement can be applied to different surfaces, including floors, walls, countertops, shower stalls, and furniture. This adaptability allows consistent design themes, such as a bathroom, throughout a given space.
- Durability: Beyond its decorative appeal, Skraffino microcement is very durable, making it suitable for high-traffic areas while maintaining its aesthetic qualities. Unlike tile and fiberglass shower units, there are no grout lines to clean or repair.


Why you should choose Skraffino microcement for your bathroom or shower.
One of Skraffino’s primary benefits is its seamless finish, which eliminates grout lines and reduces areas where mold and mildew can develop. Seamless surfaces result in a cleaner, more hygienic space that is easy to maintain. Microcement is also highly resistant to water, a perfect choice for showers, bathroom floors, countertops, and walls. Its flexibility allows it to be applied over many different substrates, including tiles, concrete, and plaster, which saves the time and cost of removing old materials.
How to Install Skraffino Microcement in a Shower stall.
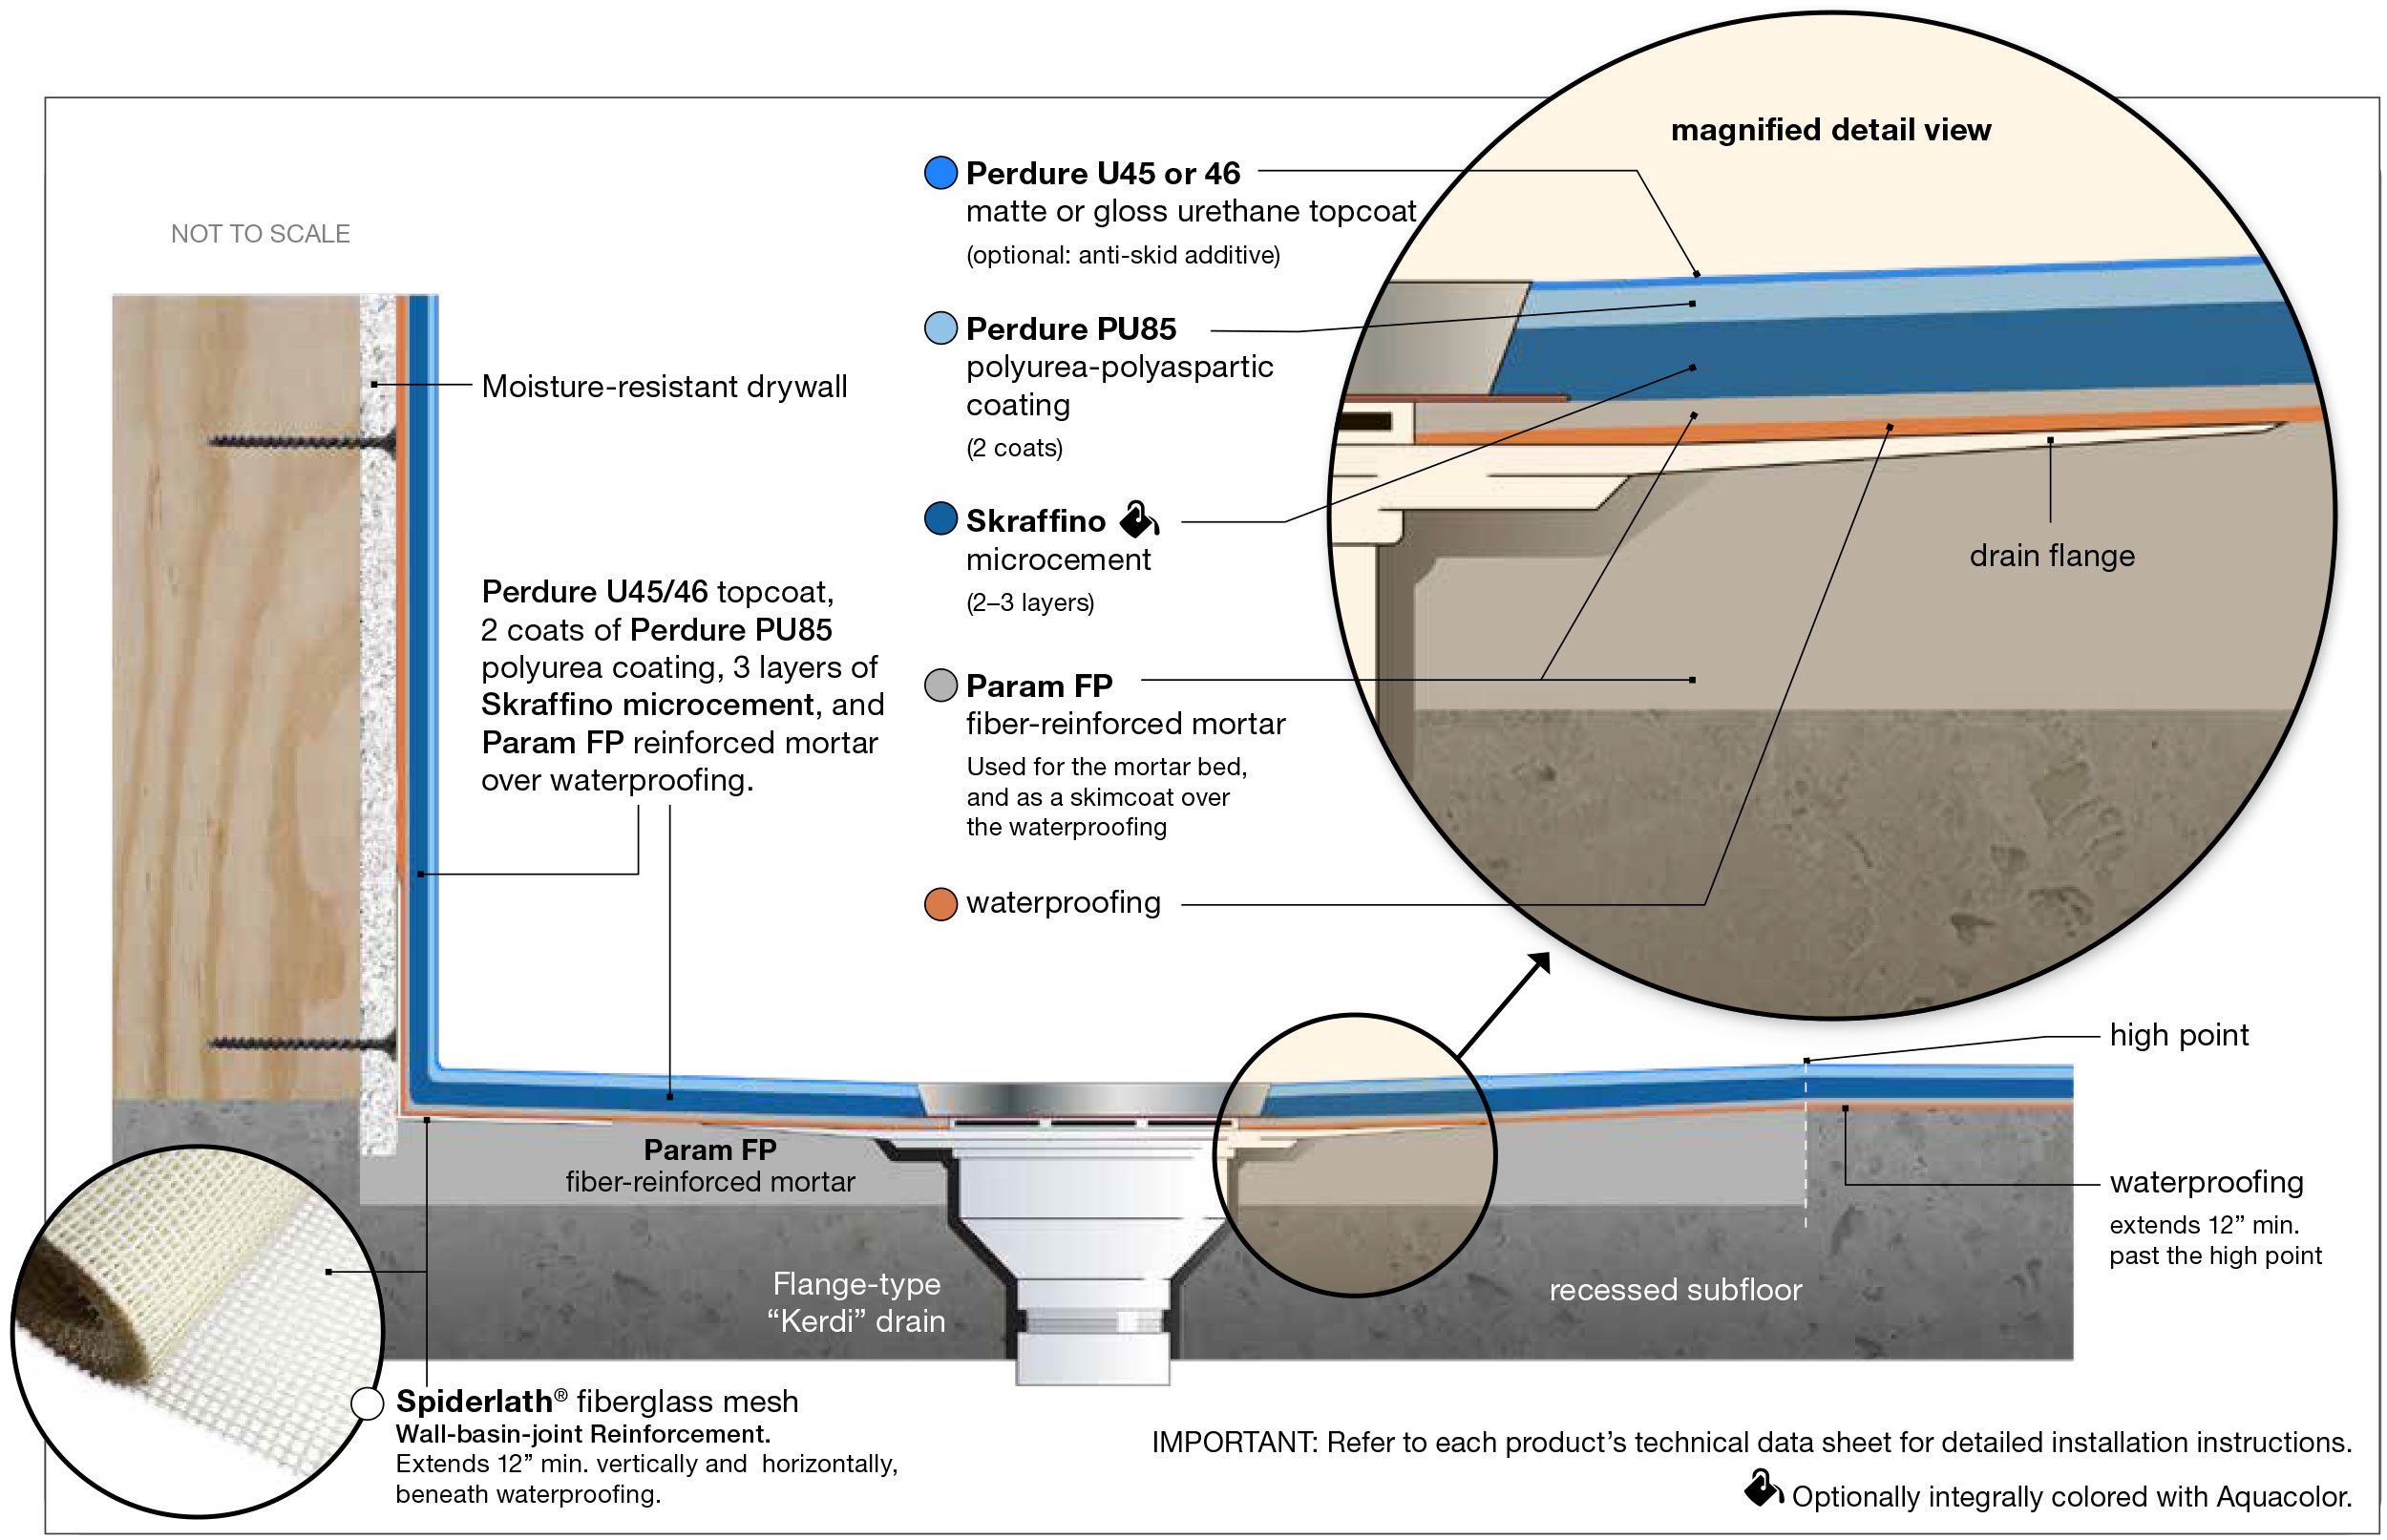
download the above illustration
We will use the installation of Skraffino microcement in a shower as an example, as the installation of microcements on walls and floors is less complex.
Please refer to the diagram on this page and direct any questions to a Duraamen-certified representative.
Preparation:
Remove the old shower stall if one exists. Ensure the shower stall area is clean and free of dust, grease, and lose materials. Remove any existing grout, glue, or silicone. For concrete substrates, fix any cracks or imperfections.
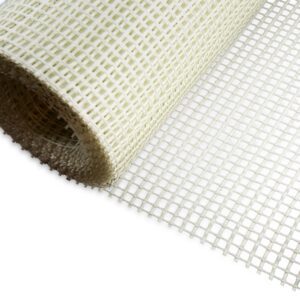
For plywood substrates, ensure that any leftover residue from the old shower is removed and that the wood is in good condition and fastened securely to the floor joists or substrate. Replace any water-damaged wood. Seal all joints with mesh and joint filler, apply a primer, and cover the area with Spiderlath fiberglass mesh.
The shower walls should be made of moisture-resistant drywall/backer board. If not, replace the material with moisture-resistant drywall. Inspect the walls for moisture and mold damage and repair or replace material as necessary.
Inspect the shower drain. A flange-type “Kerdi” shower drain is highly recommended for this project. Replace the shower drain if necessary.
A clean dry surface is crucial for the microcement to adhere properly.
The shower basin
Use Param FP (fiber-reinforced) concrete overlay to fill-in the shower basin.
Following the product’s instructions, prepare Duraamen’s Param FP concrete overlay, and pour it into the shower basin. Fill the basin to the level of the drain flange (see diagram). The overlay must not cover the top of the flange. Using a trowel, create a gentle slope from a predetermined high point in the basin towards the drain in all directions.
Shower walls and basin joints
To reinforce the shower wall-basin seam, use a fiberglass mesh, like Spiderlath®, to cover these corner joints. The mesh should extend at least 12″ up the wall and into the pan. The mesh is secured with a thin coat of Param FP concrete overlay.
Apply the waterproofing
Once the Param FP overlay has cured, apply the waterproofing material to the shower basin and walls. The waterproofing membrane should be installed as seamlessly as possible in the basin and at least 12″ up the sides of the walls.
Once installed, cover the waterproofing on the walls and basin with a thin coat of Param FP concrete overlay. The Param FP should raise the depth of the shower pan floor to the level of the bottom of the drain cap. (see diagram).
Apply Skraffino Microcement
Mix the Skraffino according to the product’s instructions. Apply Skraffino microcement in 2-3 thin layers using a trowel. Maintain an even thickness on the walls and basin. Aim for a thickness of 1mm per layer and an overall thickness of 2-3mm (approx. 1/8”).
At this point of the installation, you can create a low-relief decorative texture to the walls, if so desired.
Sealing and finishing
Once the microcement has cured apply two coats of Perdure PU-85 polyurea-polyaspartic coating to provide added durability. Let the PU-85 cure between coats.
When the PU85 has fully cured, apply the final topcoat. Choose either Perdure U45 (matte) or Perdure U46 (gloss) urethane topcoat. Using a non-lint nap roller, apply the final finish to your new beautiful shower enclosure.
How to Install Microcements on bathroom walls and flooring.


Installing microcement over bathroom walls is similar to the process described here but with fewer steps and materials. The installation process for microcement over existing bathroom flooring varies depending on the substrate. Here are some helpful how-to videos that will help you learn more about installing microcements.

When it comes to combining style, durability, and practicality; nothing beats concrete microcements for bathroom remodeling.
Now you’re familiar with the benefits and installation of concrete microcements in bathrooms. You know microcements are seamless, eliminating the need for grout lines, have a sleek and modern look that minimizes mold and mildew, and can be installed over many surfaces, including floors, walls, and countertops.
Skraffino Microcement is the ideal choice for creating a cohesive design throughout a bathroom. Customize the color and texture so that homeowners can achieve their desired look, a smooth, polished finish, or a more textured, rustic appearance.
Shop our store for the products and tools to get started or contact a Duraamen representative for more information.