If you’re remodeling a home or business and want to upgrade to an elegant, polished concrete floor, it’s probably easier and more affordable than you think. If you’ve got a plywood subfloor, as many buildings do, you can leave it in place and apply self-leveling concrete directly on top of it. Once the plywood subfloor is covered, apply the finish you want to achieve the desired look. You can also use self-leveling concrete on plywood as an underlayment for other types of floor coverings, such as carpet or tile.
Whether you’re a homeowner, contractor, or property manager, self-leveling concrete is a cost-effective, durable option for replacing cracked, uneven, or worn floors.
What Is Self-Leveling Concrete?
Self-leveling concrete has been modified with a polymer to improve flow. When poured, it can be easily spread to surrounding areas using a gauge rake or another smoothing tool.
The polymer also helps keep the mixture homogeneous, preventing larger, heavier particles from settling to the bottom as the floor cures. This means the concrete thickness can vary across the floor without affecting the appearance, ensuring a uniform, level look across the entire floor.
Self-leveling concrete applied over plywood is effective for various surfaces. It is suitable for use under flexible coverings or wooden flooring, enhancing cement and concrete surfaces. Additionally, it can be applied to gypsum substrates and is ideal for renovating existing floors, such as terrazzo and ceramic tile. This type of concrete is also compatible with rubber and resilient floor coverings and works well on OSB and plywood surfaces.
One of the main advantages of self-leveling concrete over plywood is its ease of application. This concrete can be applied directly without priming, making it a quick solution for leveling and smoothing uneven surfaces. It is designed specifically for interior applications and significantly reduces dust during installation.
The properties of self-leveling concrete include rapid hardening, allowing it to be ready for floor covering installation within 12 to 16 hours for a half-inch thickness and 48 hours for a two-inch thickness. It supports various flooring coverings, including flexible and wood flooring, cement and concrete surfaces, gypsum, terrazzo, ceramic tiles, rubber, and other resilient coverings.
Furthermore, self-leveling concrete over plywood exhibits very low shrinkage, preventing cracks and ensuring durability. It is also compatible with underfloor heating systems, enhancing its utility in modern construction settings. The thickness of the applied concrete can range from 1/2 inch to 2 inches, depending on requirements.
In terms of strength, self-leveling concrete exhibits high compressive strength, achieving up to 6300 psi after 28 days and 2400 psi after the first day, per ASTM C109. This high strength makes it suitable for areas with heavy foot traffic and even caster wheel loads.
Overall, self-leveling concrete provides a robust, efficient, and versatile solution for smoothing and leveling plywood substrates, ensuring suitability for a wide range of applications and delivering a professional finish in any construction or renovation project.
Benefits of Using Self-Leveling Concrete on Plywood
Beyond aesthetics, there are many reasons to consider using self-leveling concrete to replace an existing floor. Some of the benefits of this approach include the following:
Use the existing subfloor
Once you remove the existing flooring to reveal the plywood subfloor, you don’t have to remove any additional layers. Prepare the plywood per the installation instructions, then pour the self-leveling concrete on top.
Apply with ease
Because self-leveling concrete has lower viscosity than regular concrete, installation and leveling do not require vibration or compaction, making it easier to install, especially for DIYers. There is no need to rent any special equipment, and the installation steps are easy to follow.
Get a new floor faster
Compared to regular concrete, self-leveling concrete requires less time to install. The curing time is also generally shorter, so once the concrete is poured, your new floor can be ready in hours instead of days.
Save money
Self-leveling concrete can be applied in a thin layer, typically about half an inch thick. This reduces material requirements compared to conventional concrete, making it a cost-effective solution. For businesses, a new floor can be poured overnight and be ready to use in the morning, reducing downtime and minimizing impact on customers.
Get the look you want
A range of sealants, colors, and finishes lets you achieve the look you want. Whether it’s a utilitarian shop floor or a modern concrete tile look in the kitchen, self-leveling concrete enables you to achieve it without professional installation.
Enjoy a lifetime of durability
With its high compressive strength, the new floor can be sealed as a wear surface. Whether you’re using it as an underlayment or the finished floor, you can count on it to last a long time.
How to Install Self-Leveling Concrete
Although a professional certainly can install your new floor if it’s not a task you want to undertake, installing self-leveling concrete can also be a DIY project.
Requirements for installation
The plywood subfloor must be firm to ensure the concrete surface is installed correctly. It must not bend or deflect by more than L/480. If it does, it needs to be strengthened first. You can do this by applying another layer of plywood, screwed down at six-inch centers.
The thickness of the plywood subfloor must be a minimum of 3/4″ of an inch, and it should be tongue-and-groove, untreated, APA-rated, Type 1, exterior-grade plywood, OSB, or equivalent.
Prepare the surface
The wood surface must be clean and free of oil, grease, wax, coatings, and other contaminants that could prevent the materials from forming a strong bond. Follow these steps to prepare the surface:
- Sand the surface to bare wood to remove any visible sheen.
- Replace any weak or water-damaged areas with new plywood.
- Secure loose boards with deck screws.
- Ensure that no screwheads are showing.
- Seam the joints with structural mesh and structural urethane.
Create a perimeter around the area where you will be pouring the self-leveling concrete to prevent it from spreading beyond the edge. This will also help you get a clean edge for a professional look. You can use foam that is adhered with double-sided tape, or any other method that creates a temporary rim around the floor. If there are any penetrations through the floor for wiring, plumbing, or mechanical systems, they should also be lined with duct tape along the perimeter to prevent adhesion to the concrete. Once all of these steps have been performed, it’s time to prime the wood.
Prime the surface
Primer helps seal the wood, preventing moisture from the concrete from being absorbed into the subfloor. Apply one thin coat of undiluted Paramol primer using a 3/8″ nap roller and a brush on the corners and edges. Ensure all areas are covered, and there is no puddling on the subfloor. Brush off any puddles and excess primer and allow the primer to dry for 6-8 hours, but no more than 24 hours. If it has dried for more than 24 hours, a second primer coat will be required.
If you’re applying a concrete topping to a wood floor with moisture concerns, a flexible waterproofing membrane over the plywood is all that is needed to protect the floor.
Apply the lathe
Metal lath is applied to the prepared wood and must be securely and cleanly adhered. Once the primer is dry and tack-free, install galvanized, expanded diamond metal lath, using lath screws approximately every six inches, and overlap adjacent pieces roughly every six inches. Remember that the concrete overlay may be as thin as 3/8″, which is another reason the surface preparation is so necessary. After the lath is placed, allow the Paramol to dry thoroughly.
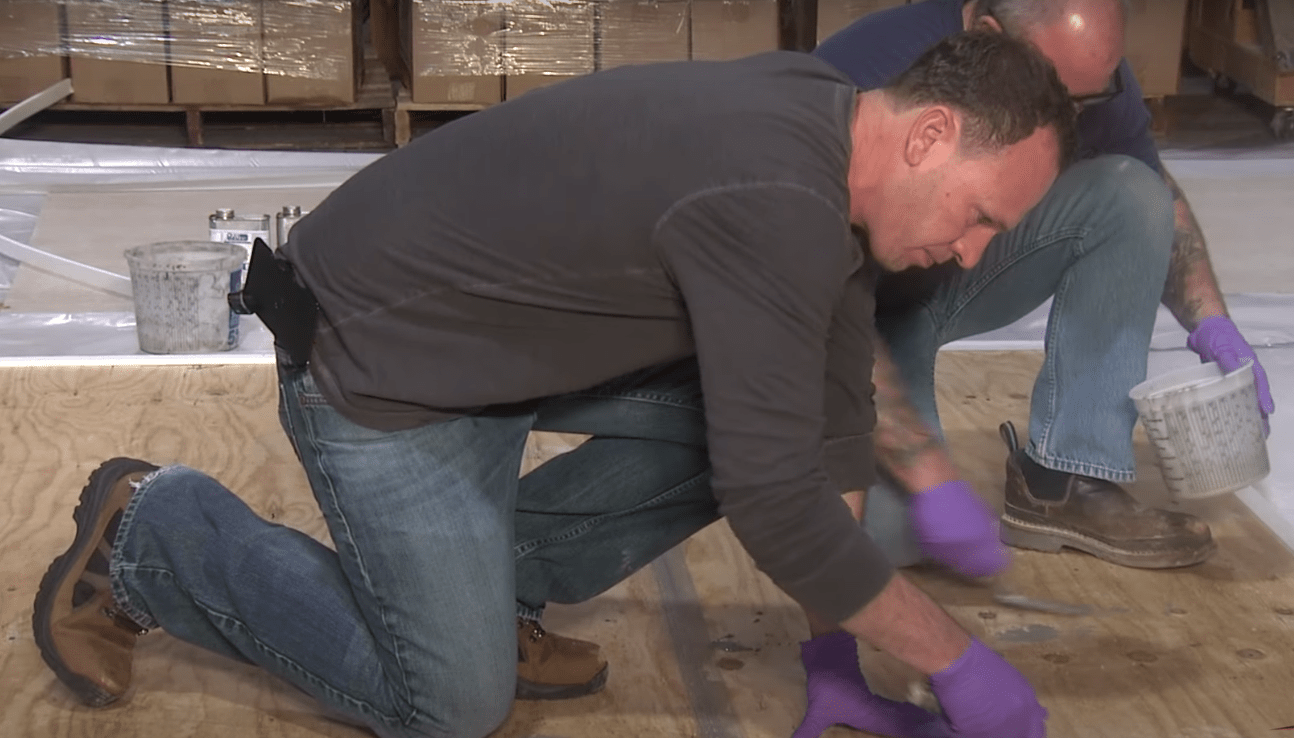
Apply the concrete
Wear dust masks and gloves to prevent inhalation and skin contact while mixing and applying self-leveling concrete. Using a 650 rpm drill, mix the concrete at the recommended proportions for three full minutes in large drums that have been pre-wetted to prevent them from absorbing water from the mixture.
Use a gauge rake with the ears set to the thickness of the concrete you are laying to spread it in an even layer. Then use a smoothing paddle to spread the material evenly across the entire area. For larger areas where walking on uncured concrete is required, wear cleats to avoid leaving large footprints. The new floor will be set within a few hours.
Common Challenges with Self-Leveling Concrete
Although installing a new floor with self-leveling concrete is a suitable DIY job, there are some pitfalls to avoid to ensure a flawless finish.
Visible screwheads
If screwheads are visible in the subfloor before you pour the self-leveling concrete, they could affect the floor’s quality. When the concrete cures, you might see screw heads ghosting through the surface, which can make it look uneven and less uniform. Over time, if the screwheads rust, it could weaken the bond between the concrete and the subfloor, reducing the new floor’s durability.
Poorly applied primer
Although it might be tempting to skip this step or rush through it, primer is essential for proper adhesion between concrete and wood. Not using a primer or missing spots can also allow wood outgassing bubbles to rise through the concrete, affecting the surface smoothness.
Incorrectly applied lathe
If the lath edges curl up or there are any floating areas, the mesh could penetrate the concrete and affect the surface quality. Overlapping the edges and ensuring that the entire surface is firmly secured will help you avoid this problem. If you notice the lath coming through after the concrete has been poured, secure it with screws and smooth it out again.
Incorrect water-to-concrete proportions
Having too little water in the mixture will reduce its ability to spread and level, whereas adding too much will affect the strength of the cured concrete and may also result in visible smoothing lines.
Plywood Porosity
Plywood is challenging to pour concrete on because its porosity prevents the concrete from settling evenly. A viable workaround the porous nature of plywood involves using cementitious mixes designed to replicate the surface and durability of concrete, which can effectively address the issues caused by plywood’s porosity.
Use Duraamen for Your Concrete Floor
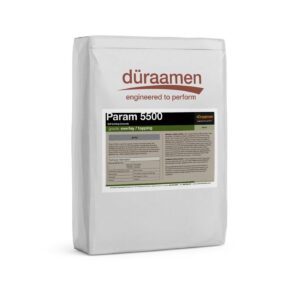
Replacing or repairing a floor can be daunting, but using self-leveling concrete makes it easier to achieve a flawless, level floor. Duraamen’s industrial and polished concrete flooring products are designed to provide long-lasting, labor-saving flooring solutions. Talk to an expert about your flooring challenges or to learn more about Param 5500 or any of our other self-leveling concrete products.
For complete Installation Instructions, please watch the videos on this page – How to Install Self-Leveling Concrete over Plywood Substrate (duraamen.com)
If you are DIY Enthusiast, you may want to consider our self-leveling concrete packages – DIY Self-Leveling Polished Concrete for Commercial & Residential (duraamen.com)