Learn how to install stampable concrete overlay and create beautiful designs for your driveway, walkway, sidewalk or patio. When resurfacing an existing interior or exterior concrete substrate, Stampable overlays represent an attractive option. In this article we’ll review the installation process to allow you to create a natural masterpiece from gray concrete.
Stampable concrete overlays are an effective way to transform plain or worn concrete surfaces into decorative finishes that resemble stone, brick, or tile. Instead of removing the existing slab, contractors apply a specialized cement-based overlay over structurally sound concrete, making it a cost-effective resurfacing solution.
The installation process begins with proper surface preparation, which includes cleaning the concrete, repairing cracks, and ensuring the slab is structurally stable. Good surface preparation is essential because the strength of the bond between the existing concrete and the new overlay determines the durability of the finished surface.
Once the surface is ready, a bonding primer is typically applied to promote adhesion between the old concrete and the stampable overlay. The overlay mixture is then applied evenly across the surface using a trowel or squeegee to create a uniform layer.
While the overlay is still workable, decorative stamps are pressed into the material to create textures that mimic natural stone, slate, cobblestone, or brick. This stamping process adds depth and character to the surface, allowing designers to create custom decorative concrete finishes.
After stamping, the overlay is allowed to cure before applying protective sealers that enhance the color and protect the surface from moisture, stains, and abrasion. A properly installed stampable overlay can rejuvenate patios, walkways, driveways, and pool decks while extending the life of the existing concrete.
With the right installation techniques and materials, stampable overlays offer a durable and visually appealing way to upgrade concrete surfaces without the cost and disruption of replacing the entire slab.
Pasto is a polymer-modified cement-based stamp overlay solution. This product is designed to simply add water and mix. Pasto is then applied at normally a 3/8 of an inch thickness in one application. After it is ready, you stamp it with the desired texture and pattern.
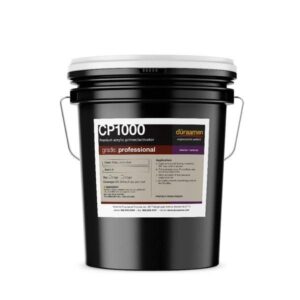
The first step is to prime the surface with CP1000 acrylic. You can apply with a garden sprayer and then spread the material. It must be applied over the entire substrate. The CP 1000 application acts as a bonding primer. After this is applied you wait about four hours.

This is an important step for a variety of reasons. If you install stampable overlays to unprimed concrete, the system could dry instantly. The moisture from the overly would be taken into the concrete and this causes it to be flash set, eliminating workability.
In the mixing step, you need a proper volume of water to make sure the mix is consistent. Too much promotes shrinkage and cracking, and too little reduces adhesion. Stampable overlays are usually between ¼ and ¾ of an inch thick. This is a judgment call based on the profile of the texture skin or stamp mat used.
Application occurs with a gauge rake. The material is distributed to all areas at the required level of thickness. You can refine this process shortly afterwards with finishing tools. The next step is to trowel the area. Then wait another 2 hours before pattern stamping.
A release agent has to be applied to the stamping mats and the surface. These are packaged both in dry and liquid form. When spraying the release, agitate the sprayer by a gentle shaking process so that the pigment doesn’t settle to the bottom. The proper timing to start stamping is critical. One technique is to gently press down with a finger onto the surface. If no material sticks, then the time is perfect. When the overlay is placed, the applicator stands on top of the stamping mat. One of the easiest methods is using seamless texture skins. Once your skill levels increase, you can move into pattern stamping. Stains are a final step and create amazing color combinations. Dyes deserve equal attention. These agents can create vibrant color patterns in the yellow, purple, and blue spectrums. Dyes can be used with acid stains to produce discrete markings of different colors. Finally, you apply a solvent-based acrylic sealer by either spraying or dipping and rolling it on. This enhances the color and brings it to life. 4 hours are allowed between coats. Using dyes, almost any color is achievable. Stampable Overlay will create a fresh, new and durable presence for your project.
Please CLICK HERE to watch the complete installation process.
Duraamen Industrial and Polished Concrete Flooring Products are designed to provide labor saving and long lasting flooring solutions. Talk to an expert about your flooring challenges…Please Call + 973 230 1301 / Email Us