Installing self-leveling concrete over a plywood subfloor is one of the most in-demand skills in the decorative concrete industry, and when done right, it transforms an ordinary wood substrate into a seamless, polished surface that rivals any slab installation. Plywood is a particularly challenging substrate because it expands, contracts, and flexes with changes in temperature and humidity — all of which can cause a concrete overlay to crack if the prep work is not executed correctly. That is why proper priming with Paramol is the essential first step: it penetrates the plywood, seals the surface, and creates the bond strength that everything else depends on. Spiderlath reinforcement mesh is then embedded into the wet primer coat to bridge the natural movement of the plywood underneath, dramatically reducing the risk of cracking and ensuring the overlay performs like concrete poured over a rigid slab.
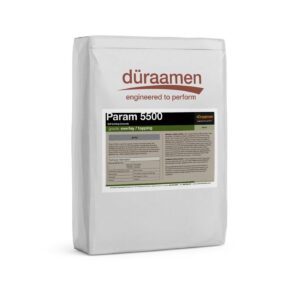
Once the reinforcement layer is in place, Param 5500 self-leveling concrete is mixed and poured, flowing naturally to fill low spots and create a perfectly flat, smooth surface without the need for troweling. Param 5500 is an exceptionally strong, moisture-resistant, and fast-setting material, making it an ideal choice for residential renovations, commercial retrofits, and any project where speed and performance both matter. After the concrete has cured, Aquacolor water-based stains open up a world of color possibilities — from rich earth tones to bold contemporary hues — applied with techniques that allow blending and layering for a truly custom result. The water-based formula of Aquacolor makes it a low-odor, environmentally responsible choice without sacrificing vibrancy or depth of color. Sealing with Perdure A03 water-based acrylic sealer locks in the color and protects the surface from moisture, staining, and everyday wear, forming the critical protective barrier that keeps the floor looking sharp for years. A final coat of Perdure U45 water-based matte polyurethane brings the project home, adding a durable, scuff-resistant finish that enhances the concrete’s natural appearance without creating a plasticky sheen. Whether you are a contractor looking to expand your decorative concrete skillset or a property owner tackling a renovation, this two-part video series with industry expert Bob Harris from the Decorative Concrete Institute gives you the knowledge and confidence to get it done right. Contact Duraamen to learn more about Param 5500, Spiderlath, and the full range of products used in this installation.

- Plywood Substrate in a kitchen

- Metal lath stapled over plywood substrate
The installation of calcium aluminate cement based self-leveling concrete, Param 5500 along with expanded metal lath for reinforcement is a successful fast-track method to convert a plywood subfloor into a beautiful concrete floor. We recommend applying Param 5500 at a minimum thickness of 1/2″ to withstand lateral movement and traffic stress.

Self leveling concrete covering metal lath
Steps:
- The wood subfloor must either be solid hardwood flooring, a minimum of ¾” tongue-and-groove, APA – rated, Type 1, exterior exposure plywood, or OSB equivalent. The subfloor should be solid and fixed securely to provide a rigid base. Any boards exhibiting movement should be renailed. The surface of the wood must be clean and free of oil, grease, wax, dirt, varnish, shellac, or any contaminant that might act as a bond breaker. We recommend sanding the wood surface with 60 grit sanding screen under floor maintainer.
- The open joints should be filled with a rapid-setting patching compound.
- After the wood surface is thoroughly prepared, prime the surface with Paramol. The primer solution should be distributed evenly over the floor surface and then brushed into the substrate with a soft bristled push broom. Avoid pudding of primer. When applying with a pump sprayer, make sure to cover the substrate with an even coat to ensure proper penetration and follow immediately behind to work into the surface with a push broom.
- Allow the primer to dry to a thin, slightly tacky film (min. 2 hours, max.12 hours). Install 3.4 galvanized, expanded diamond metal lath mesh to the wood subfloor, stapling approximately 6 inches to prevent the mesh from floating. Overlap adjacent pieces of lath mesh approximately 2”.
- It is time now to install Param 5500. It is mixed in 2-bag batches at one time. For each bag, add 5.0 quarts of cool, potable water. Mix for at least 3 minutes with a heavy duty drill mixer (minimum 750rpm) to obtain a lump-free mix. Install at no less than 3/8” thickness over the highest point in the floor.
- Protect the poured Param 5500 from excessive heat or draft conditions during the curing process. Turn off all forced ventilation and radiant heating systems. Protect for up to 24 hours after completed installation. The floor can be walked on in 3-4 hours. However, if the surface is colored using a dyes or stains or any other concrete micro-topping (Skraffino) or covered with epoxy or polyurethane resin coatings or simply sealed with acrylic, epoxy and polyurethane sealers, we recommend waiting for at least 24 hours. Any other type of floor covering (tiles, VCT, etc.) can be installed after 16 hours.
- The installation process is shown in detail on this page – https://duraamen.com/installation-videos/install-sl-concrete-plywood-spiderlath/